This will be a short tutorial just to introduce you in your first steps on how to use AutoCAD, specifically, you´ll know of what is available in the AutoCAD main window.
At first view, AutoCAD Window looks a little bit overwhelming, because it contains a lot of drafting and editing commands, but most important thing to note on how to use AutoCAD is that you don´t need to memorize it, just need to be aware about its structure. Let´s know it:
This is a typical layout of the AutoCAD window:
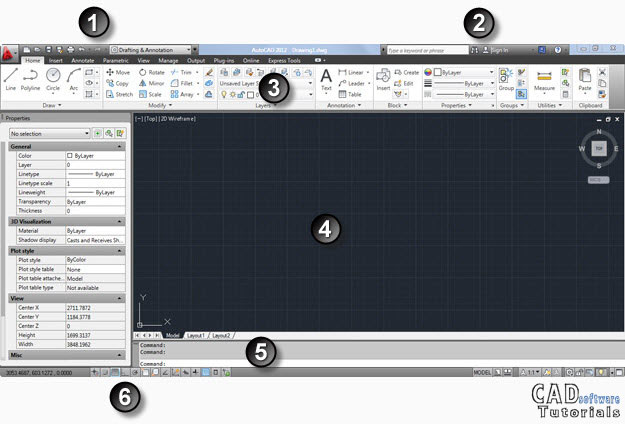
It is divided into the following parts:
1 Quick Access Toolbar. As in most WINDOWS® programs, this toolbar includes by default, the basic file-handling functions (save, open, new), plotting and Undo and Redo commands. Of course it can be customized to show your most used commands. 2InfoCenter. When learning how to use AutoCAD, for sure you’ll need to find information about the program, based on a keyword, question or phrase. InfoCenter allows you to type that word and find a list of related resources:
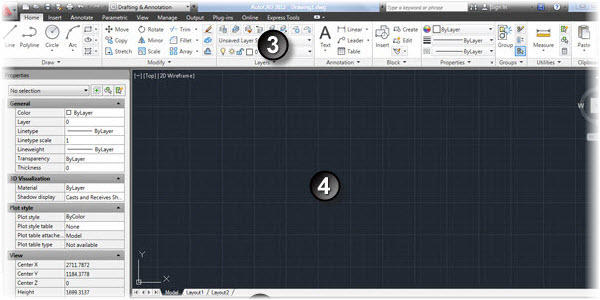
The most prominent feature in the Ribbon, especially for those people looking forward to learn how to use AutoCAD as fast as possible, is the tool tips.
Each tool in the Ribbon’s panels will offer a tool tip explaining -through a descriptive text and an image- how to use it. Just move arrow cursor onto any tool and leave it there for a moment: a simple tool tip will appear below the cursor:

holding the cursor a bit longer over the tool will add even more information: a tutorial image about how to use selected tool:

Of course there are a lot of important features in the Ribbon, but we´ll explain them in detail on futures AutoCAD tutorials.
4Drawing Area (or where the magic begins). Most of AutoCAD window is occupied by the drawing area, as this is the place where all your drawings will appear.Note that, when you move cursor within this area, crosshairs appear: this is the drawing cursor, which lets you picking points in the drawing area.
The L-shaped figure in the lower-left corner of the drawing area is the UCS (User Coordinate System) icon and, as you think, indicates the X and Y axes in the Cartesian coordinate system.

Below the drawing area you will see: One Model tab which is where all the drawing will be done, usually, to real scale (1 drawing unit = 1 ft, for example) and one or more Layout tabs (also known as Paper Space) that are like the sheet of paper where you´ll plot your drawing to scale.
5The Command Window (or how AutoCAD communicates with you). An important step knowing how to use AutoCAD is to understand what the command window is.
Essentially is in Command windows where interactivity with AutoCAD takes place. You can write commands (each drawing tool has an equivalent keyboard command) to create lines, circles or to erase drawing entities, among other actions. Also in command window AutoCAD will display responses to your input, displaying all your previous actions:

